Activity settings

You can implement the new settings when creating an assignment by following the next steps:

How to use this feature:

STEP 1
Click on the gear button on the upper right-hand corner when creating or modifying an assignment.
STEP 2
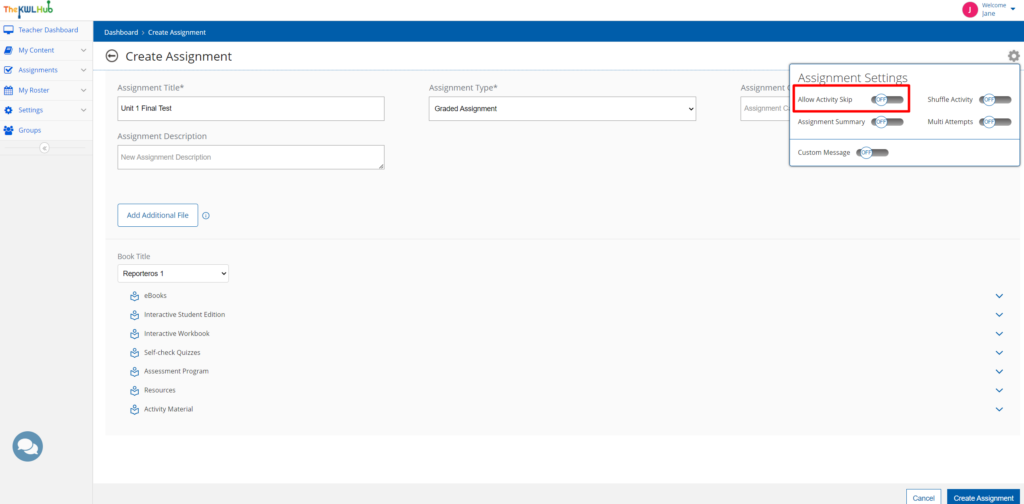
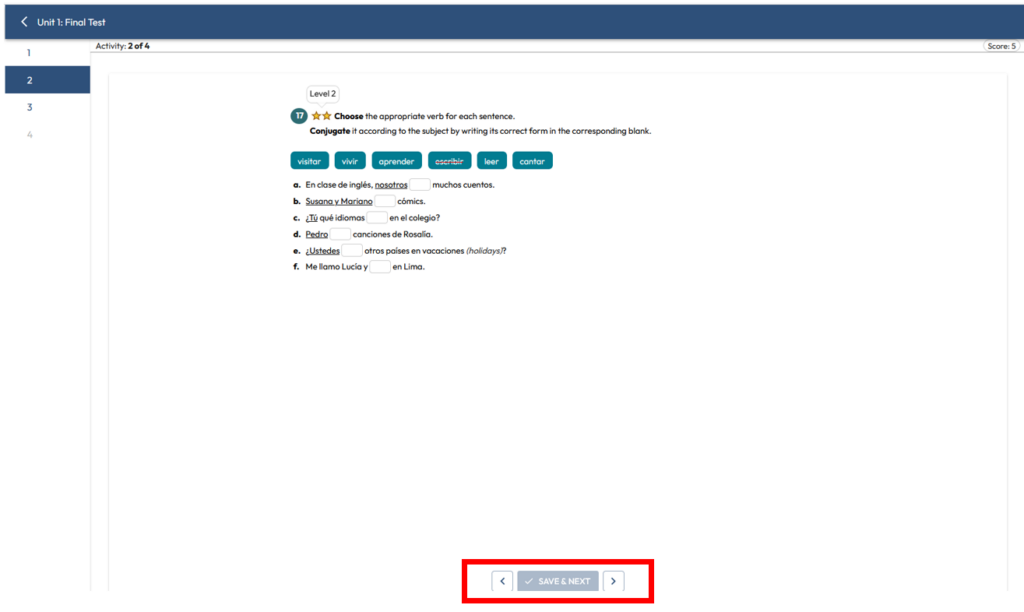
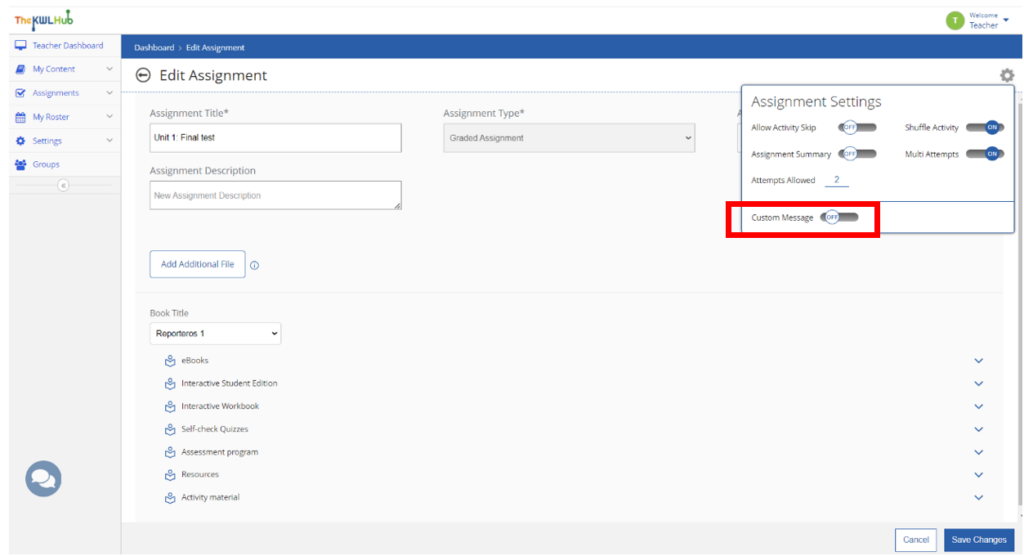
In the “Assignment settings” menu, you can activate the option “Allow Activity Skip” option, which will allow students to skip the questions, without submitting an answer. It will also allow them to return to those questions that they skipped using the navigation buttons displayed at the bottom of their assignment screen.

This is how the “Allow Activity Skip” option is displayed for students. 

STEP 3
In the “Assignment Settings” menu you can also activate the “Assignment Summary” option. This will allow students to see a visual summary of their results of the assignment.

This is how students see the “Assignment Summary” after submitting an assignment. They have a visual summary of the number of correct activities, the partially correct activities, as well as the incorrect activities. They can also see the number of activities that they skipped and the ones that need to be graded by the teacher. By clicking on “View Answers” they will be able to see all the activities of the assignment.

STEP 4
In the “Assignment Settings” menu you can also activate the “Custom Message” option. You will be able to provide overall feedback for different grade ranges. Bear in mind that the ranges must be ordered from 0 to 100.
STEP 5
As you can see, the grades range from 0 to 100. By clicking on “+ New Message” you can create as many messages as you need.

The students will be able to see the feedback you wish, according to their grade, once they have submitted their assignment. In this example, the message “Excellent job!” was the feedback stipulated for grades between 80% and 100%.

STEP 6
In the "Assignment settings" menu you can also activate the option "Shuffle Activity". By activating the “Shuffle Activity” option, the order of the different activities chosen from the book drop-down menu will be altered. However, the different questions from the same activity will remain in the same order.
STEP 7
You can also activate the "Multi Attempts" option in order for your students to be able to retake the assignment as many times as you set.

The student will be able to see the number of attempts on the lower right-hand corner. Once they have answered all the questions, they will have to click on the “Validate” button. Bear in mind that if they click the “Submit” button, they won’t have the opportunity to have a second attempt, because the assignment will be automatically submitted.

After clicking on the “Validate” button, the students will have feedback from their first attempt, being able to change the wrong answers before clicking on the “Submit” button to finally submit the assignment.